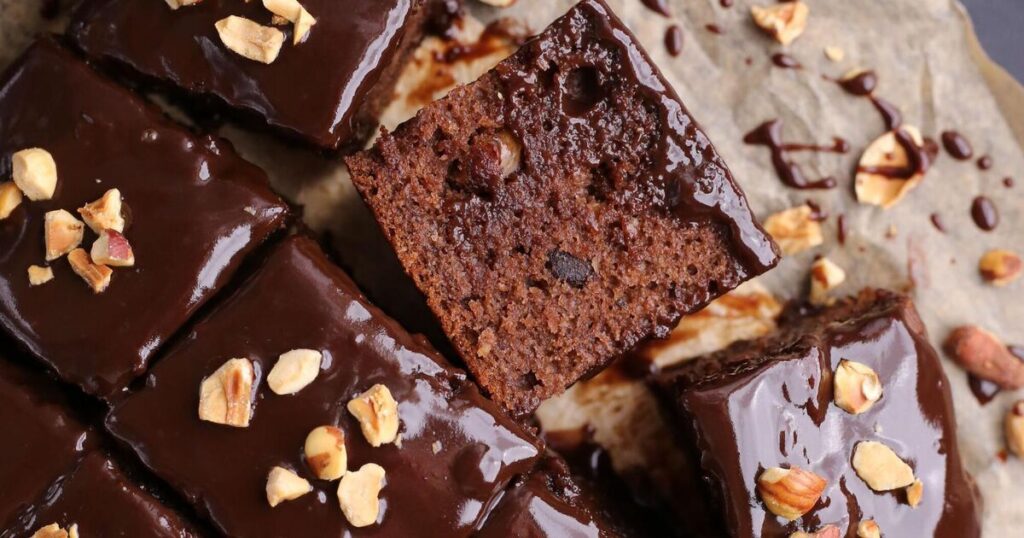
Tomorrow is Father’s Day, and this is a recipe that all the family can participate in making.
The margin of error is quite low, so little hands can help without too many undue consequences.
Breaking up the chocolate into small pieces is a favourite activity in our house, but I always need a bit extra, as some of it inevitably gets munched.
Peanuts and chocolate are a delicious blend of flavours and textures. I always gravitate towards them as a combination.
The creaminess of the peanut butter adds a beautifully soft texture to the squares.
I use a crunchy peanut butter which also adds a little bite, but smooth works just as well.
You can make your own peanut butter and blend it to whatever texture you desire.
Add enough peanuts to fill your food processor to a third and pulse the power on and off for a few minutes until the nuts begin to breakdown. I use lightly salted peanuts.
You will need to stop and scrape down the sides with a spatula a few times.
It may seem like you need to add oil but if you hold your patience, the nuts will eventually begin to form a smooth paste.
Blend until you have the texture you wish. This homemade nut butter will store for about four weeks in an airtight jar.
If you use unsalted peanuts, you will probably have to add a few pinches of salt to bring out the flavour.
Chocolate Peanut-Butter Squares
“The creaminess of the peanut butter adds a beautifully soft texture to the squares. I use a crunchy peanut butter which also adds a little bite, but smooth works just as well.”
Preparation Time
20 mins
Ingredients
-
for the base
-
3 eggs, separated
-
200g dark chocolate, broken into small, even-sized pieces
-
220g peanut butter
-
250g muscovado sugar
-
1 tsp vanilla extract
-
100g self-raising flour, sieved
-
for the topping
-
100mls cream
-
150g dark chocolate, broken into small even sized pieces
-
½ tbsp butter
-
2 tbsp chopped peanuts, roasted
Method
-
1. Line an 8 x 8-inch baking tin with parchment.
-
2. Preheat your oven to 170ºC/gas mark 3.
-
3. Whisk the egg whites into stiff peaks and set aside.
-
4. Melt the chocolate in a heatproof dish over some hot water on a hob, or in your microwave.
-
5. Beat the sugar and peanut butter and add in the melted chocolate.
-
6. Beat in the egg yolks and vanilla.
-
7. Stir in the flour until combined.
-
8. Fold the egg whites into the mixture.
-
9. Scoop the batter into your prepared tin and smooth out the top.
-
10. Bake for 20 minutes or until the edges are firming up.
-
11. Once cool enough to handle remove the bake onto a wire rack to cool completely.
-
12. Heat the cream and when shivering then remove it from the heat and stir in the chocolate pieces and butter until melted.
-
13. Allow the topping to come to just above room temperature then pour it over the bake.
-
14. Cut into nine squares.
-
15. Sprinkle the chopped roasted peanuts on top.
- If you only have smooth peanut butter but would like a crunch you can stir a tablespoon of chopped peanuts into the batter as well.
- If you are melting the chocolate on the hob using the double boiler method, (sit a heatproof dish full of chocolate pieces over some hot water on a hob, making sure it doesn’t touch the water) it is important to prevent any steam getting into the chocolate. Steam will cause it to seize up because the cocoa particles will clump together leaving you with a grainy mixture which tastes a far cry from smooth and shiny chocolate. You can try and reverse this process by whisking in some melted butter, a teaspoon at a time. Whisking vigorously between each teaspoon of butter added.
- When folding egg whites into the batter, it is best to stir a little in first to loosen the mixture then fold the remaining egg whites in.
- If the squares turn out very flat, it may be due to over-mixing. The air in the egg whites helps the squares to rise, so it is important to stop the air bubbles deflating and fold the egg white into the batter gently rather than stir. To do this, you cut down through the mixture with the side of your wooden spoon or spatula then lift a large spoonful of the mixture and fold it over. You can rotate the bowl as you do this to ensure all the mixture gets incorporated with the egg white.
- Shivering cream means that it is just below the boiling point. There will be very small bubbles beginning to form at the edges of the saucepan and the top of the liquid will literally look like it is shivering.
- These slices will last four days in an airtight container, or they freeze well, without the topping. The topping can then be added after the slices are defrosted.
By substituting the peanut butter for almond butter and then adding chopped hazelnuts on top, it changes the taste quite dramatically.
You can use pistachio butter in place of the peanut butter and then use nice green and pink chopped pistachios to decorate. This combination has become very popular lately.
For this version you can simply scoop the batter into paper bun cases instead of baking it as a traybake.
You may have to reduce your baking time by about five minutes, depending on your oven.
Wait and allow the topping to firm up completely before piping it onto the buns.


